Category Archives: IT & Tech

Interesting stuff from the world of bits, bytes and hardware.

Fixing FaceTrackNoIR head tracking with 64bit game binaries

If you’re like me, you’re both a simracing and flightsimming buff. My sims of choice are rfactor2 for simracing and Falcon BMS (4.33 was released not too long ago) for flight sims.

While using a head tracking device feels very natural when it comes to flightsimming (I’m using the excellent DelanClip with FaceTrackNoIR), it always felt strange when simracing in rfactor2, I just couldn’t get used to it. The fact that the stock FTNoIR install didn’t work with the 64bit rfactor2 executable didn’t help, either.

Shtalik” on the BMS forum came up with a solution: Simply use the npclient64.dll from the OpenTrack zip archive and extract it to your FTNoIR directory. Following that, you should not have any problems enjoying head tracking in your favourite 64bit sim of choice.


Yet another Python-based vcalendar parser you can use with “Mutt”

The Mutt email client at work… thanks to symlink.dk

I’m still using “Mutt” as my main email client if you can believe it, and yes, I know it’s 2015. Still for me personally nothing allows me to work through my daily inbox at work (which can easily grow to 1,000 new messages a day) quicker than a keyboard-controlled, ASCII only email client like the venerable mutt (before that, I migrated from Unix’ old “mail” to “elm” in case you remember those).

No matter what tool I tried when attpempting to teach Mutt to show event invitations, parsing exchange-generated vcalendar events never worked properly for me, so I decided to come up with my own (much like every Python hacker worth his salt has to come up with an entire scratch built CMS framework at some point ;))

You can find the results below — as usual, the code is butt ugly (for some reason, my Python has started looking even worse than my Perl recently if such a thing is possible), but it does the job and works for me; YMMV.  You’ll certainly need to translate the field labels into your own language, but that shouldn’t be too difficult. You can then use mutt’s “auto_display” function to call the script automatically on text/calendar entries.


#!/usr/bin/env python
import sys

from datetime import *


def date_to_string(d):
 # 20151006T103000
 now=datetime.now()
 dt = datetime.strptime(d, "%Y%m%dT%H%M%S")
 return "%s (%d days)" % (dt.strftime("%A, %d. %B %Y, %H:%M Uhr"),
 abs (dt-now).days)


if __name__=="__main__":
 attendees=[]
 data=open(sys.argv[1]).readlines()
 for l in data:
 if l.find("ATTENDEE") > -1:
 attendees.append(l.strip().split(";")[4].replace('CN="', '').split(",")[0])
 if l.find('DTSTART;')==0:
 event_start=l.strip().split(":")[1]
 if l.find('DTEND;')==0:
 event_end=l.strip().split(":")[1]
 if l.find('SUMMARY;')==0:
 event_subject=l.strip().split(":")[1]
 if l.find('ORGANIZER;')==0:
 organizer = l.strip().split(";")[1].replace('"', '')
 orga_name, bla, orga_mail = organizer.split(":")
 orga_name=orga_name.replace('CN=', '')
 if l.find("LOCATION;")==0:
 location=l.strip().split(":")[1].replace('\\', '')

 if l.find("TZID:")==0:
 time_zone=l.strip().split(":")[1]
 
 
 print "===================================================================="
 print "Thema : ", event_subject
 print "Ersteller : ", orga_name
 print " ", orga_mail
 print "Start : ", date_to_string(event_start)
 print "Ende : ", date_to_string(event_end)
 print "Zeitzone : ", time_zone
 print "Ort : ", location
 print "Teilnehmer: ", ", ".join(attendees) 
 print "===================================================================="
 
 sys.exit(0)

A fresh Look at Linux Mint 17.2

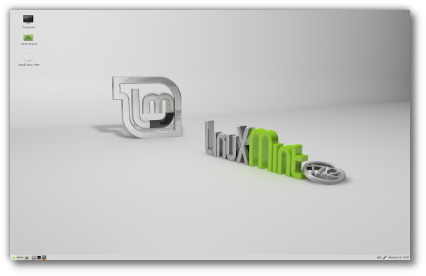
Linux Mint “Rafaela” 17.2

Back in the day, I used to be a Linux Mint user and advocate, going back to Mint 7 and Mint 8. I just loved the fresh, modern and mostly mint-green looks of the interface, the painless installation and its ease of use even for folks that were new to Linux, so I guess you could call it my “mom and dad” distro of choice (in fact, my Mom used Linux mint ever since she started dabbling with computers and the internet until she passed away in 2010).

I got fed up with Mint because of the seemingly stubborn refusal by the Mint team to support non-destructive upgrades between releases; if you wanted the newest, freshest Mint, a complete re-install would be on the cards.  I eventually ended up being an Ubuntu user (again), mostly in the form of the XFCE-based xubuntu or Lubuntu which uses the LXDE desktop by default.

When my brother in law Keith asked for my help in breathing new life into his malware ridden win7 “home premium” Fujitsu notebook a few weeks ago, I naturally tended towards xfce because of its rather modest hardware requirements, but while preparing a bunch of USB media to boot and install from I thought “What the heck” and downloaded Linux Mint Cinnamon edition (64bit, version 17.2).

A quick check showed the usb stick to boot fine and boy, was it quick! I hadn’t looked at cinnamon in a while either, and I really liked what I saw, with the numerous codecs and add-on software that comes with Mint (1,6GB iso compared to a meagre 800MB or so for xfce) it was an easy choice with Mint to get my in-law up running in the shortest amount of time.

With Keith being a scout leader, I realized that windows office compatibility and good hardware support (skype, printing, scanning what have you) would be a great bonus.

Installation

The first major disappointment was on the cards for us when we found no way of reducing the NTFS partition on the notebook. I seem to recall this being possible in earlier Ubuntu (which mint is still based on) and Mint releases, but this feature seems to have been removed. Just to make sure I checked xubuntu 14.04 and 15.04 which I’d also available on USB sticks, but sure enough those distros didn’t support shrinking the windows partition, either.

As we had a backup of most of the important stuff on an external drive this was no major obstacle though, so we decided to wipe the entire disk and configure it for Mint’s exclusive use.

The rest of the installation was easy and went quickly as expected.

Network

Network config was painless and worked out of the box, both for the ethernet port and the wireless chip, but that’s to be expected these days. During the installation Mint downloaded updates and extra language packs which is a nice bonus.

Hardware support

Installing the Brother printer drivers wasn’t quite as easy, and I guess a Linux newbie would have given up here, but as I’ve been a Unix user since 1990 or so I wasn’t fazed by the text-based shell script installer wrapper that’s provided by Brother (yes, they do list Linux as a supported OS on their homepage, nice!), so the only problem we had was to find out the printer’s IP address on the LAN (I have no idea why the printer part of the installer was able to determine it automatically, but the scanner software installer asking for the IP address specifically).

Sure enough, printing worked and even scanning was supported using the “simple scan” tool, and, to be honest, non-SCSI scanners (remember those?) have been notoriously difficult on Linux in the past  (especially those all-in-one printer / scanner / copier crap garbage printers by HP and the like), so I was very pleasantly surprised when everything worked just great.

Multimedia & Networking: Skype

Next on the list was “Skype” which Keith uses to stay in touch with his Scout leader mates and his family back in England. Installation was a breeze using apt with Skype readily available via the stock Mint repo), and in short order we were able to place a test call with a friend. However the internal speakers being broken in the notebook, Keith got a headset to check the audio output, and my heart skipped a beat when he (rather mindlessly) plugged in a USB headset, simply expecting it to work, I knew we were in trouble from here.

To my amazement, as soon as he’d plugged in the headset, it started working in Skype as if by magic, no reboot / pulseaudio stuff or even a Skye restart required. Amazing how far Linux has come in terms of hardware support!

Multimedia pt. II: Banshee

As we had to kill Keith’s MP3 collection when formatting the hard disk (there simply wasn’t time to copy it all over to the usb drive), we were naturally interested in how to rip his CD collection in Mint. Being  the “bearded type” Unix user, I told him I’d use ripperX for that purpose, an ancient perl wrapper around several multimedia tools. Before I’d finished the sentence, he’d jammed an Audio C/D in the notebook’s cdrom drive and was ripping it to  his “Musci” folder using Banshee’s “Import Media” function.

“Aha”, I went, “hang on, this is surely going to be OGG Vorbis which will get you in trouble if you try playing it on your car’s stereo”, so I checked the Music folder expecting a bunch of (technically superior, but not yet as widely supported) OGG Vorbis files.

No, another surprise: Familiar “.mp3” tags all over the place, fantastic. We tried a more esoteric piece of his collection which I was sure would not be recognized as a known album online, but sure enough Banshee was able to download track / title / album info from the depths of the net just like it was nothing. Wow! Just wow. This was getting very interesting.

Multimedia pt. III: Playing DVDs

VLC by VideoLAN

I was quickly running out of things that usually break on a fresh Linux install, so trying encrypted DVD playback was on the cards next.

“True Grit” went into the notebook’s drive, VLC came up, the menu played, one more click and were happily watching the movie in VLC, effortlessly switching between scenes, audio tracks and whatnot. Another wow from your “Unix bearded” type, for Keith it was the expected behaviour I guess 😉


Multimedia pt iV: YT & Friends

4k video downloader in action

Ok, you know the feeling: You watch a nice music vid on Youtube and would like to keep  / download for offline use.  I had heard of 4k video downloader, but had never tried it personally, so we were able to download it from the website, right click on the package and select “Install using GDebi” and we were downloading stuff from YT about two minutes later, even being able to extract the audio part only and integrate it into the music collection automatically. Nice!


Alternative Browsers

Being a Firefox user on Windows, Keith was rather happy to find Firefox available on Mint as the default browser, but he’d heard of google Chrome but wasn’t too pleased about the company’s policies. So in order for him to be able to try an alternative browser, I installed Chromium (again from the repos so it was just an apt-get away) so he could take a look at a different and leaner browser (some might argue this point, but I’ve found Chromium to be quite a bit faster than Firefox on similar hardware).

Suspend / Resume

Another thing that has been quite finicky in the past on Linux based Notebooks is the power management, especially suspending and resuming the OS from hibernation. Everything appeared to work flawlessly on Linux Mint here: The system went to sleep properly using the swap partition (?) for the memory image and resuming when opening the lid again.

Conclusion

Linux Mint has come a long, long looong way since I last gave it a good, hard look in the form of the first “Linux Mint Debian Edition” a few years back (then hoping to avoid the “reinstall” issue in order to upgrade to the latest release). While I have no idea how long 17.2 is going to be supported, I feel we’ve found the optimal “Newbie” distro again for a casual computer user where all he / she needs to do is to browse the web, do some word processing / spreadsheet stuff, check their emails and do some multimedia stuff every once in a while.

Linux Mint 17.2 looks great, has a comprehensive feel to it that comes across as very integrated and apparently the designers have given some serious thought to choosing the best applications for the job. There’s always more from the plethora of apt repos if you need it, but the default choices made seem to be very good.

I’d recommend Linux Mint to anyone wanting to take a quick, fresh look at a modern Linux desktop distro, and I’m quite sure it’s going to make its way onto my next notebook.

Note

All media content has been imported / linked to from the original (c) holder’s web sites. Please let me know if there is a problem with that. Thanks!

IBus / openbox eats Ctrl-Space… how do I set the mark in GNU Emacs?

GNU Emacs: The Editor to Rule Them All

This problem has been bugging me for a while now until finally today I sat down trying to fix it.

This post

http://lists.gnu.org/archive/html/help-gnu-emacs/2014-05/msg00282.html

on the GNU mailing list had the working and simple solution: ibus maps Ctrl-Spase to “next input method”, so all one needs to do is to run “ibus-setup” from a terminal and map this function to some other keyboard combination that’s not frequently used, and hey presto!, setting the mark in GNU emacs works again as expected.

Happy holidays!


OpenStack “icehouse”: We’re online

After two lazy Fridays hacking around on OpenStack “IceHouse”, I’ve now got the first instance up on an old HP DL380G5 style server with 64GB or RAM, 8 vCores and a total of 2,4TB disk space.

Setting it all up was surprisingly easy and much less of a headache than I thought, in many ways thanks to the fantastic OpenStack Ubuntu manual (the hardware currently runs 12.04 LTS).

This is the first virtual server that’s actually doing something a “medium” instance, running a wordpress site powered by a MariaDB backend. The performance isn’t great, but then again it’s old hardware and there are probably some knobs waiting to be twisted and turned in their appropriate directions.

I had previously played around with “devstack.sh” which is basically one huge bash script that pulls the latest and greatest from git and works all kinds of magic, but there are two major downsides to this approach:

  • not really intended for production sites
  • It’s basically a black box that mostly works but leaves you baffled as to what it actually did to your system.

So after a couple of vain attempts I decided to take the no-shortcut route and install everything manually, hopefully leaving me with a stable system that can be updated as new releases openstack releases appear.


Next on the list: Cinder for block storage fun, then maybe giving glusterfs on some hapless CentOS VMs a try  😉

Repopulating a bogofilter wordlist.db after corruption

So it had to happen eventually: My 660MB wordlist.db file got corrupted without any chance of recovering or repairing it. Having amassed a large amount of spam messages in an mbox file called “spam” during bogofilter’s operation, it’s quite easy to repopulate the wordlist using the “formail” command:

$ formail -ds sh -c 'cat  | bogofilter -s ' < spam

This operation may take a while depending on your spam mailbox size and your disk speed, but it should set you up quickly with bogofilter in a working state.

It’s also advisable to check the spam mailbox for false positives *before* feeding it to formail to reduce the chance or legit mails ending up in your spambox due to false flagging by bogofilter.


Aldi Medion Grafik-Tablett unter Ubuntu

Feine Sache, das 40€-Tablett aus dem heutigen Aldi-Angebot läuft auch unter Linux…

usb 1-1.2: Product: Graphics Tablet
[25185.390571] usb 1-1.2: Manufacturer: WALTOP International Corp.
[25185.401639] input: WALTOP International Corp. Graphics Tablet as /devices/pci0000:00/0000:00:1a.0/usb1/1-1/1-1.2/1-1.2:1.0/input/input18
[25185.401888] hid-generic 0003:172F:0047.0003: input,hidraw2: USB HID v1.10 Mouse [WALTOP International Corp. Graphics Tablet] on usb-0000:00:1a.0-1.2/input0
[25917.665185] usb 1-1.2: USB disconnect, device number 5


Funktionstasten habe ich noch nicht alle ausprobiert, aber wenn es derart erkannt wird, ist das ja schon die halbe Miete!

Da das Haus hier voller Linkshänder ist, war die Drehbarkeit per Software wichtig, und die scheint ebenfalls zu funktionieren.


Growing a RAID1 mirror (destructively) on an HP Proliant Server using hpacucli

(c) hp.com

Recently, we’ve had to replace a RAID1 mirror consisting of 2 146GB drives with 2 300GB ones. As we were able to move the data elsewhere on the server during the process, this was possible online without rebooting the server and causing unnecessary downtimes. Here’s what we did:

– unmount the device if necessary (we were using it for Oracle raw devices so we had to move stuff within Oracle in order to be able to remove it)

– Identify the logical device (usually /dev/cciss/c0d0 or similar). For this example, we’ll be using /dev/cciss/c0d0 (the first logical drive on the first controller #0) .

– Find the logical drive for the mount point by using hpacucli:

show ctrl=0 ld all

then, for each logical drive <n>, do

show ctrl=0 ld <n> show

Eventually, you’ll find the Linux device in this line:

Disk Name: /dev/cciss/c0d0

– Find out which physical drives make up the logical drive by turning on their leds:

ctrl slot=0 ld 0 modify led=on

Now the blue leds on the drives should be lit. Pull the drives from the storage / box server and wait a minute or two.

hpacucli now should have marked the logical drive as failed:

ctrl slot=0 ld 0 show status
Status: Failed

Now install the new (hopefully larger ;-)) drives and use hpacucli again to verify it’s now seeing the larger drives:

ctrl slot=0 ld 0 show


You should now see the larger drives in these lines:


Mirror Group 0:
 physicaldrive 1I:1:3 (port 1I:box 1:bay 3, SAS, 300 GB, OK)
 Mirror Group 1:
 physicaldrive 2I:1:7 (port 2I:box 1:bay 7, SAS, 300 GB, OK)

Now you can re-enable the mirror, using those larger devices:

ctrl slot=0 ld 0 modify reenable

You’ll have to confirm that data on the LD will be lost, but it’s no biggie as you copied the stuff elsewhere, right? 😉

Finally, grow the logical drive to its new capacity:

ctrl slot=0 ld 5 modify size=286070

(this is for a 300GB SAS drive).

Instruct the Linux kernel to partprobe the new disks (they should come up empty with no partitions on them):

# partprobe

That’s it, you should now be able to access the new, larger logical drive using the old Linux device name at /dev/cciss/c0d0. Create partitions as needed and copy back your data to the new device.


Snipping and adding fade in / out effects using ffmpeg

While you might think ffmpeg is well documented on Linux given its relative maturity, I found the docs provided very confusing and even misleading as some filters (like “afade”) referenced in many examples weren’t even availble on Ubuntu 12.04 LTS. (check your own version using the “-filters” ffmpeg argument: After much searching and googling, I arrived at the solution below and I’m documenting it here for my own use and posterity 😉

Get the latest static ffmpeg build to make sure you have the “afade” filter available for Linux:

http://ffmpeg.gusari.org/static/

Extract ffmpeg to somewhere in your path (I use $HOME/bin). 

Extract 70 seconds of audio, starting at 60 seconds into the file:

ffmpeg -i test.mp3  -ss 60 -t 70 test01.mp3

Add the fade-in effect (4 seconds):

ffmpeg -i test01.mp3 -af "afade=t=in:ss=0:d=4" test02.mp3

Add the fade-out effect (5 seconds, starting at 65 seconds) to the new file:

ffmpeg -i test02.mp3 -af "afade=t=out:st=65:d=5" test03.mp3

I guess this could be done in a better way, combining the snipping and the filtering in one go, but I couldn’t figure out the correct filter / snipping syntax. If you do, please comment.


Hoovers Piece of Pie

I finally got around to setting up my Raspberry Pie (v2, 512 mb RAM, 8GB SD-Card) over the last week. Right now, it’s a print- and openvpn server and also functions as a webcam using a logitech quickcam connected to the 2nd USB port.

I had no luck with Raspbian as it continuously failed to set up the ethernet port (even when hard-coding an ifconfig in /etc/rc.local), so I gave Arch Linux a try on the pie (that rhymes) and it worked like a charm beginning with the first boot (I had planned taking a look at Arch for a long time anyway, so this was the perfect opportunity.


pie01


As you can see, the pie is not really mounted in any sort of professional manner, but I hope to get around to building a Lego “case” for it over the weekend. Once it’s achieved a decent uptime, I’ll move the setup into the cellar but for now, I like to look at the blinking lights every once in a while when I’m hacking away on other projects 😉

Arch Linux is surprisingly lean and uses less than a Gigabyte of space on the SD-Card, currently about 1,1GB are used on the root partition out of 2gb that the setup allocated for it.

Edit: Case prototype made from LEGO :

pie_lego_case


Fixing the noisy internal fan in a Thrustmaster T500 RS wheel (without voiding your warranty)

Hi folks,


this post will explain how to fix the noisy, 5-cent fan that comes with most if not all ThrustMaster T500 RS wheel. To get this out of the way first: It’s simply incomprehensible why TM haven’t included a better quality fan with their otherwise extremely well-engineered product; A Euro or two extra wouldn’t have been to bad and would have gone a long way towards user satisfaction. Anyway, here goes.


DISCLAIMER: If you shock yourself of family member to death following this procedure, I’m certainly not the one to blame. I’m happy to know which end of the soldering iron gets hot, and that’s as far as my electronic skills go…. Gladly, none are required for this easy fix.

DISCLAMIER II: This fix looks *ugly*, and I mean ugly. No biggie though, it’s easy to improve on yourself so don’t worry. If you’re like me, you’re watching the road ahead while simracing and not caring about how your wheel looks.

t500RS_noisy_fan_fix

Parts list:


o Battery pack / 9V DC battery (I have some battery packs left over from my Tamiya RC car racing days)

o 12 cm PC fan (the more silent, the better; I’m using a 12cm xilence fan)

o cable connectors (you can also solder these if you want to)

How to go about it:

– Carefully cut off the mainboard connectors from the fan, you’ll only need the red and black cable, keep the yellow one though if you want to regulate the fan at a later point (I found this unneccessary though if you use a quiet fan to begin with)

– Unplug the metal connectors from your fan connector, removing the insulation as usual from the end of the cable

– Use cable connectors to connect  the bare-metal ends of the fan with the metal connectors from your plug

– connect the metal connectors to the poles on your battery pack / battery (make sure to get the polarity right, black <—> black and red <–> red, of course)

– By now, your fan should start turning. If not, your battery pack may be dead of you might have mixed up the wire polarities

– Use a piece of string to affix the fan to the *right side* on the whell housing. The left side won’t work as it doesn’t provide enough cooling to the wheel motor in order to prevent the internal fan from coming on after 20 minutes of usage or so.

– “Enjoy the xilence” 😉


Using Juniper Network Connect on Ubuntu / Linux Mint 64 bit with SecureID token authentication

Introduction

Why another step-by-step recipe? Well, none of the ones available worked for me on Linux Mint13 64bit, so here’s a quick rundown of what you need to do in order to connect to your juniper networks vpn gateway using Linux Mint / Ubuntu 64bit and your SecureID token (I cannot test any other methods).

Executive Summary  / Abstract

For the impatient, here’s a list of the required steps:

  • Ensure your browser has a working java plugin (I used firefox)
  • download latest jnc software from your vpn gateway
  • download the vpn gateway certificate & store it locally
  • ensure the first “java” found in your PATH is a 32 bit version (installed from Oracle’s tar.gz-Archive, for instance)
  • ensure /etc/resolv.conf exists, otherwise nsvc will segfault after making a connection

Need more info? Proceed at your own risk! 😉

Preparations

Remove / rename any previous installation from your home directory, changing to your home directory first:

cd
mv .juniper_networks backup_juniper_networks

Make sure you are using Firefox for the next step with the java plugin enabled and “xterm” installed on your system (ia32-libs are required so that your system can run 32bit binaries):

sudo apt-get install xterm ia32-libs

The Gritty Details

In firefox, type “about:plugins” in the browser bar and make sure the java plugin stuff comes up.

Fire up your browser and go to your regular VPN login page to log in, using your secureid and token like you would on Windows.

Download & install the juniper networks software as usual, allow the java executable to run. (an xterm will come up asking you for your password). At least this much seemed to work out of the box for me.

If everything goes well, you’ll find a new .juniper_networks directory in your home directory.

Change into that directory and install a 32bit JDK from java.sun.com. I used this one:


cd .juniper_networks

wget http://download.oracle.com/otn-pub/java/jdk/7u17-b02/jdk-7u17-linux-i586.tar.gz


If wget doesn’t work, point your browser to java.sun.com and download the file manually, then move the tar archive to the .juniper_networks-Folder once the download is complete.

Extract the tar.gz file in your .juniper_networks directory:

tar xvzf jdk-7u17-linux-i586.tar.gz

Rename it to something like “java32” or thereabouts:

mv jdk-7u17-linux-i586 java32

Prepend the new jdk “bin” directory to your PATH:

export PATH=$HOME/.juniper_networks/java32/bin:$PATH

Make sure you’re getting the right java:

which java 
$HOME/.juniper_networks/java32/bin/java

Now comes the really braindead part: Create a file /etc/resolv.conf, otherwise ncsvc will segfault after launch:

sudo emacs /etc/resolv.conf

Enter a std nameserver here, the important thing is that this file exists:

nameserver 8.8.8.8

Save the file. On you std. dhcp / network managed Ubuntu, this file won’t exist where jnc expects it, so you have to create it manually. Nice…

Obtain your gateway’s SSL cert using the shell script provided in the “tmp” directory of your jnc installation:

cd ~/.juniper_networks/tmp

chmod +x ./getx509certificate.sh 

./getx509certificate.sh your.vpn.server.com ../network_connect/vpn.crt

Change to your network_connect directory and run the “ncsvc” Command like so:

./ncsvc -h your.server.com -r "Your Realm Name"  -f vpn.crt -L 5 -u username -p xxxxYYYYYY

If you don’t know the realm, check the HTML source of your login page, it’s usually passed along to the cgi script using some form of “hidden” input tag.  “xxxx” is your SecureID pin, with “YYYYYY” indicates the current token.

That’s it. Check the file ncsvc.log for any errors that might crop up. To track down the resolv.conf problem, I had to run “strace” on the command line above, dirty work but if it solves the problem…

Conclusion

All of this could be scripted up nicely (the PATH modification, the resolv.conf bits and so on), but wouldn’t it be easier if Juniper fixed their software? It’s quite hard to believe such a pile of crap should be let loose unto the world by such a renowned company, who knows what else lies waiting in this huge binary blob… sorry for the rant.  😉

References

http://www.joshhardman.net/juniper-network-connect-vpn-linux-64-bit/

http://ubuntuforums.org/showthread.php?t=232607&page=45&p=11189826#post11189826


Hope this helps some of you, feel free to comment if you run into problems.